Sunday, February 22, 2015

Homemade Laundry Butter

 I’ve seen many variation of homemade laundry soap.  I never found one that worked well for me.  Plus, they are usually hard to make, make me choke, or end up slimy!  Here is my variation of a cost effective, all natural laundry butter!  This recipe was adapted from the recipe from ibelieveicanfry.com.  It called for Fels Naphtha soap.  It gives me a headache, and the ingredients 
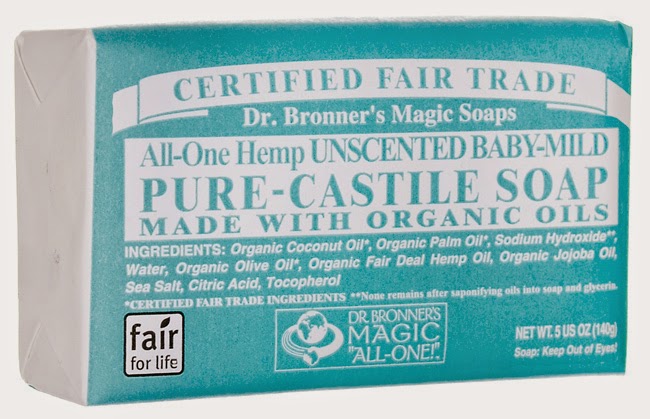
are if-y, so I am replacing it with Castile bar soap.


Homemade Laundry Butter

Ingredients:
1 bar (5 oz) Castile Bar Soap
1 cup 20 Mule Team Borax Powder
1 cup Arm & Hammer WASHING Soda (NOT Baking Soda)


The original recipe calls for using 2 wide-mouth quart mason jars or a single wide-mouth half-gallon mason jar.

-First, cut the bar soap into small cubes. Place into the mason jar (if using two jars, place half of the soap in each jar).


-Add the 3 cups of boiling water to the jar (1 1/2 cups per jar if using two jars). Let stand about 6-8 hours or overnight. The soap will melt and re-gel into a thick mixture.

-The next day (if you can't get to it for a few days, that's totally fine), use a butter knife to cut cross hatches into the gelled soap, loosening it from the bottom of the jar.

-Combine the borax and washing soda, then add to the jar (if using two jars, combine 1/2 cup of borax and 1/2 cup of washing soda and add to each jar).

-Add boiling water to the jar, enough to come to the shoulder of the jar. For the half-gallon jar, this is about 2 cups (so add 1 cup to each jar if using two quart jars). The shoulder of the jar is the line where the jar just begins to slope up towards the mouth of the jar. 

-Using a stick/immersion blender, whip the mixture until it becomes light and creamy (about 30-45 seconds or so). It will resemble mayonnaise and thicken into an emulsion.

-Allow the mixture to cool a few minutes (at least 20) and add the essential oils.  Then mix with the mixer again.

Place the lid on the jar - the laundry butter is now ready to use!


The mixture will thicken into a more solid, Crisco-like consistency after a few days - this is totally normal! It's also normal for the mixture to turn more yellow as it thickens if you use the Fels soap.  The Castile soap stays a white color.


Use 1 Tbsp (1/2 oz) per large load of laundry - this mixture will work in any type of machine (front-load, top-load, high-efficiency).

NOTE: Do NOT add the laundry butter to the detergent dispenser/compartment of your washer; it will get stuck in there. Simply add the clothes to the washer, plop a dollop of laundry butter on top of the clothes, just under where the water comes out, then turn on the washer.


NOTE: This laundry mix will NOT create a ton of suds or bubbles, but your clothes WILL get clean. Do NOT add baking soda or products like OxyClean to the mixture.

UPDATE:  I just wanted to add this.  In my batch, I put in 10 drops each of Peppermint, Lavender, Lemon, and Tangerine EO's (get yours here).  It smelled so good and the sent got stronger as it sat.  The other cool thing, besides cleaning my laundry so well, was how it cleaned my washer!  I was going to do a load of sheets and noticed my washer was smelling bad.  I have an HE washer, and when I use laundry soap like Tide, it gunks up the washer making it smell horrible.  Then you have to wash it with that powder stuff made to wash your washer...which seem kind of ironic and redundant.  Anyway, I decided I was going to wash the washer after my load of sheets.  I'm happy to report my washer was clean and smelled fresh when the load was done!  BOOM!!

For more info on how to get essential oils into your home, email me at thenaturalcollective514@gmail.com


Please note: Products mentioned in this article have not been evaluated by the FDA. These products and information on this page are not intended to diagnose, treat, cure, or prevent any disease. This website is not a substitute for professional care. If you have or suspect you may have a medical, psychological, or psychiatric problem, or a disability that requires medical attention, then you should consult your licensed medical doctor or appropriate health care provider. Always consult your medical doctor regarding your medical care. Never disregard professional medical advice or delay in seeking it because of something you have read on this website.

Sunday, February 15, 2015

DIY Sunscreen


Busy old fool, unruly Sun, 
Why dost thou thus, 
Through windows, and through curtains, call on 
us?....... -John Donne


I'll tell you why the sun calls on us...because we need it!

Exposure to the sun aids in vitamin D absorption.  Low vitamin D levels can lead to many health issues.  But, we can't just sit out and bake in it all day.  We need some level of protection.

Here's a DIY recipe to make your own healthy moisturizing sunscreen.


This recipe is roughly around SPF 20* with the help of Helichrysum essential oil and zinc oxide. Zinc oxide can absorb ultraviolet radiation of sun and protect the skin from sunburn and other damaging effects of UV radiation. Because it absorbs the broadest spectrum of ultraviolet radiation, the FDA has approved its use in sunscreen, lotions, creams, makeup, deodorant, soaps, and more.

*Note: this recipe is not suitable for SPF protection during water-related activities.

What you need:
1/2 cup olive oil
1/4 cup Fractionated Coconut Oil
1/4 cup beeswax
2 tablespoons zinc oxide (you can purchase zinc oxide here as well as at some pharmacies)
1 teaspoon vitamin E
2 tablespoons shea butter
12 drops  Helichrysum essential oil (or Geranium)

Note: You can purchase beeswax and shea butter at most health food stores or Amazon.

Directions:
Add everything except zinc oxide and Helichrysum essential oil in a medium sized glass mixing bowl.
Fill a medium saucepan with a couple inches of water and place over medium heat. Place the glass bowl on top of the saucepan so that the saucepan is cradling the bowl.
As the ingredients start to melt, stir occasionally to mix.


TIP: Use a popsicle stick to help stir for an easier cleanup.
Once all ingredients are melted, remove from heat and let the mixture cool for 3 minutes.
Add the zinc oxide and Helichrysum essential oil and stir well to mix.
Note:  Adding additional zinc oxide will increase the SPF factor.


Pour into a pint-sized tin or mason jar and store in a cool place (like a refrigerator). Use within six months.


TIME-SAVER SUNSCREEN
If you are in a rush to head to the beach or pool, you can still make an effective sunscreen with fewer ingredients.
What you need:
1 tube Spa Hand and Body Lotion (email me: thenaturalcollective514@gmail.com)
12 drops of  Helichrysum essential oil
2 tablespoons of zinc oxide
Directions:  Add ingredients to a 8-10 ounce empty lotion bottle and mix well by either stirring the mixture with a straw or shaking vigorously. Apply before sun exposure and reapply every couple of hours.


Please note: Products mentioned in this article have not been evaluated by the FDA. These products and information on this page are not intended to diagnose, treat, cure, or prevent any disease. This website is not a substitute for professional care. If you have or suspect you may have a medical, psychological, or psychiatric problem, or a disability that requires medical attention, then you should consult your licensed medical doctor or appropriate health care provider. Always consult your medical doctor regarding your medical care. Never disregard professional medical advice or delay in seeking it because of something you have read on this website.


Friday, February 13, 2015

DIY Dry Shampoo


I found a great recipe for do-it-yourself dry shampoo on the doTERRA blog.  It didn't have a blend for red/auburn hair....so I made one!


Want to know a secret? You don’t need to wash your hair every day! In fact, it may be better for your hair to take a break from the shampoo every once in a while. This DIY Dry Shampoo made with essential oils is a great way to keep your hair looking, smelling, and feeling great for those days between washes.


What You Need:
For blonde/light hair:
2 tablespoons arrowroot powder

For brunette/dark hair:
2 tablespoons arrowroot powder
2 tablespoons cocoa powder
2 drops Lavender essential oil
2 drops Rosemary essential oil
2 drops Peppermint essential oil

For Red/Auburn Hair:
2 tablespoons arrowroot powder
2 tablespoons ground cinnamon powder
2 drops Lavender essential oil
2 drops Rosemary essential oil
2 drops Peppermint essential oil


Directions:
1. Put arrowroot powder, cocoa powder or ground cinnamon poweder (if using), and essential oils into food processor.
2. Pulse until well combined.


3. Store in glass jar.
4. To use, apply powder with an old make-up brush to roots and/or oily parts of hair.


Store in a cool dry place!

Email me for more information on how to get your essential oils!  thenaturalcollective514@gmail.com


Please note: Products mentioned in this article have not been evaluated by the FDA. These products and information on this page are not intended to diagnose, treat, cure, or prevent any disease. This website is not a substitute for professional care. If you have or suspect you may have a medical, psychological, or psychiatric problem, or a disability that requires medical attention, then you should consult your licensed medical doctor or appropriate health care provider. Always consult your medical doctor regarding your medical care. Never disregard professional medical advice or delay in seeking it because of something you have read on this website.

Wednesday, February 4, 2015

Natural Hair Color with Henna

I have been an avid hair color participant since high school.  I attended Cosmetology college during my Jr and Sr. year and went on to graduate and manage a salon later on.  Guess who we got to practice on.  That's right, each other!  

With all the harmful chemicals in hair coloring agents, of coarse I went out to find a natural, yet effective, alternative.  I found it!  Henna

So, what exactly is henna?  I'm glad you asked!

THE QUICK & SIMPLE

Henna (Lawsonia Inermis) is a flowering plant.
The leaves of the Henna plant contain a natural and very effective coloring pigment: Lawsone.  This Orange/Red dye releases as the leaves are crushed. Drying, milling, and sifting the Henna leaves into a fine powder maximizes the pigment (Lawsone) release.
The powdered henna will activate with air and water. After mixing to a paste, you can apply directly to your hair or skin for Natural, Super-Effective coloring. Henna temporarily tattoos the body, and permanently colors hair.
The Lawsone dye molecules actually color the hair and skin by safely binding to their protein molecules. They darken as they absorb deeper into the hair and skin (bind to additional proteins). The color maxes out in about 48 hours and can naturally last for weeks. Pretty awesome stuff—no wonder Henna has been trusted for hair & body for thousands of years—evidence of cosmetic use found from ancient Egypt to Persia to the Roman Empire.

This wonder shrub grows in the tropical and subtropical zones of Africa, Southern Asia, and Northern Australasia. Henna thrives just outside their desert regions. And the best quality Henna, known for its color richness and content purity, is grown and harvested in Northwestern India.(source)

When Henna is mixed with an acid medium, henna will stain your nails, skin, or hair into a reddish-brown color. This makes it a safe, non-toxic way to dye your hair. Henna has been used for thousands of years to keep hair healthy and to color white or gray hair. There is only ONE color of Henna, however, there are different ranges of that color depending on the climate and soil of that plant.
There are so many amazing benefits of using Henna…

Are there types I should stay away from?
You may have seen various types of commercially produced “boxed” Henna treatments that specifies for “blond hair”, “black hair” or strawberry-blonde hair”. From what I've read of others who have used Henna over the years, these are very poor quality of Henna. They are produced by adding synthetic dyes, metallic salts, and other plant dyes to a poor quality of Henna. You want to steer very clear of anything that is labeled for a specific hair color. Look for Henna that is 100% Henna. The best quality you can get is Henna that is labeled “body-art Henna.” It has the highest dye content of Henna.
What will Henna Look Like?
  

Because the red-orange dye molecule is binding to the keratin that surrounds the pigmented hair core, the resulting color is different for every strand of hair, and for every person. The henna stain is translucent, and blends with your own color. Hennaed hair looks like you grew it yourself! The color you get on your hair will vary depending on your hair color you have now and the chemicals you already have on your hair. Many ask if it is safe to apply Henna on color-treated hair and the answer is YES! But it’s only safe to use high quality, body-art quality Henna(like this one).
Henna IS permanent if you use 100% Henna.  You will have a new growth as your hair grows out.  The Hennaed hair will still be going strong with color and highlights, though!  To keep it even more beautiful, it was recommend to use a wild-crafted, raw, vegan shampoo and conditioner like this one.   If you have African hair, Henna will be amazing for it! It won’t dye your hair completely red, but it will give it red highlights, loosen the curl, and make it silky!
How to Apply Henna to Your Hair 
You need to use a acid medium to apply henna. Lemon juice does this very well. When mixed together it releases the dye and binds to the keratin in your hair. This makes Henna permanent.
Step One:  MIX IT! Mix enough henna with lemon juice to make it like the consistency of mashed potatoes (see photo below). If lemon juice is too harsh on your skin, use something less acidic like grapefruit or orange juice. You could use vinegar or wine, but your hair will be a little stinky for awhile. Don’t use boiling water or your Henna will fade and be an ugly orange.
  • Short Hair (use 100g or 1 cup)
  • Collar Length Hair (use 200g or 2 cups)
  • Shoulder Length Hair (use 300g or 3 cups)
  • Waist Length Hair (use 500g or 5 cups)
If you have thick hair, add an extra 1/2 cup to a cup of Henna powder. 


Step Two: REST IT. You need to let your Henna paste rest for several hours. I mix the Henna in the morning and apply to my hair at night. Letting it rest allows the slow dye release and will give you the BEST results. Cover your Henna with a plastic wrap and let it stew.
Step Three: MIX IT AGAIN. It’s been several hours and you are ready to apply. Mix some more lemon juice with the paste mixture until it is the consistency of yogurt.
Step Four: APPLY IT. WEAR GLOVES. Henna is permanent and it will stain everything it comes in contact with. This is the messy step. There are a few suggestions to make it easier. Get in your bathtub and fill it up with water. Apply the Henna while standing in your tub. Or, you can go outside and apply. Bring a mirror.
  • Do not be stingy. Apply generously and thick for a deep, rich color.
  • Comb your hair and divide it into sections.
  • You can put the Henna in a piping back, squeeze bottle, or just use your fingers and apply. I find the latter to be the easiest.
  • Start at the back and work the Henna down to the scalp. Apply it thick! Then bring down the next section and Henna it. Make sure every bit of hair is THICKLY coated…like cake frosting. Don’t be afraid to use plenty of Henna and don’t be afraid to get messy.

(Yeah, it looks kind of gross)

Step Five: RELAX. When all your hair is covered with Henna, wipe your skin clean of any Henna, and wrap everything up in a plastic wrap. This keeps the Henna warm and moist and allows the hair to take in the dye. I then wrap a large DARK towel (remember Henna will stain anything it touches) around my head. This is when I go to bed. Yes, I sleep with the Henna on my head all night. This is not necessary but it was what was suggested to me.  They have found that it covers gray hair the best when you leave it on for at least 6 hours. The normal recommendation is 2-4 hours, but if you know that your hair is resistant to dye or has gray, then you may want to leave it on a little longer. I lay a dark towel over my pillow and sleep. I actually sleep really well with Henna on my head and it is also known that Henna can soothe headaches. So, just relax and enjoy the full benefit that Henna can give you.


Step Six: RINSE IT. Time to rinse out the Henna. I have short hair so this step isn’t too difficult. I take a nice long shower and rinse it out completely. I follow it with a wash and condition. If your hair is much longer, you can fill up the bathtub and lay down in the water. This helps get the Henna out.
A few things…
  • Henna may seem really bright at first. Do not panic…it will darken over the next few days if you used the acidic mix. It will take about 3 days to settle into the true color.
  • Once again, DO NOT be stingy with the mix. More is always better with Henna.
  • You can use this on beards too if you would like!
  • Some people can’t stand the smell of Henna. It’s earthy and sultry. If you can’t stand the smell, you can add 1 TB of powdered ginger, clove, or cinnamon to your Henna mix.  I mixed Cassia oil in mine...just one drop.  It made it warm and relaxing!  Rosemary is great, too!
Where to Buy Henna: 
  1. Order “body-art quality” henna from HERE.
  2. Check a local Indian store to buy it SUPER cheap!!! Just make sure it’s 100% Henna!


Sources:

http://www.hennaforhair.com/techniques/deb/

Please note: Products mentioned in this article have not been evaluated by the FDA. These products and information on this page are not intended to diagnose, treat, cure, or prevent any disease. This website is not a substitute for professional care. If you have or suspect you may have a medical, psychological, or psychiatric problem, or a disability that requires medical attention, then you should consult your licensed medical doctor or appropriate health care provider. Always consult your medical doctor regarding your medical care. Never disregard professional medical advice or delay in seeking it because of something you have read on this website.

Sunday, February 1, 2015

The Renaissance Mama's Whipped Love Butter


Ok, now we are going to get a little intimate….. let’s talk about lube, shall we?
 (Warning….this post will refer to the vagina….a lot….)

Seriously, there are so many ways that your personal lubricant may be harming you.  And guess what, you aren't just eating this stuff… your also putting it in your vagina. HELLO?!

Here is why your over-the-counter personal lubricant (may be) terrible for you:
  • It may decrease fertility
  • It may feed Candida
  • It may kill vaginal flora
  • It may cause hormone disruption
  • It may cause cell damage
It's even worse if you are using a petroleum based product.  Read this report from AARP.

Sound sexy, huh? Why not try this instead?! This is an EDIBLE, soft, and luscious homemade lubricant. Not only is it completely natural and safe, but it also can be used for a sensual massage. You don’t have to whip it, however, whipping it makes it easier to scoop out when the moment arises! If you do whip it and you live in hot weather, it will probably not hold it’s form. However, like I said, whipping is optional. If your house is below 73 degrees, then it should hold it’s whipped form.

For this recipe, I highly recommend you use the best quality products you can find. I like to the ones I recommend in the recipe below. This recipe uses Peppermint Essential Oil which has some really great benefits for vaginal health. You don’t need a lot of peppermint essential oil (ouch), but just enough to get some good vaginal health benefits, along with making the love butter even more delicious! Let’s face it, mint and chocolate together are just delicious! Bonus that the peppermint also causes a slight cooling/tingling sensation! You pay big bucks for those lubricants in the store.

I, also, use coconut oil in this recipe which is anti-viral and anti-fungal. The only warning that I give is that you CANNOT use this lubricant with latex condoms. I recommend you pick up polyurethane condom (non-latex) if you do use condoms. Trojan and Lifestyles both make one.

I add honey to the recipe to make it so yummy. If you like, you can omit the honey...but it does taste better in my option!

For a warming sensation, use a little Cinnamon or Cassia oil instead of Peppermint!

Please remember, essential oils are very powerful.  Start with the minimum amount and work your way up.

Chocolate Mint Love Butter

Ingredients:
1/2 cup of Cacoa/Cocoa Butter
1/2 cup of coconut oil
4 drops of Peppermint Essential Oil or less depending on your sensitivity ( get it here)
3 teaspoons of raw honey – you can omit this if you are just making a massage butter and won’t need it to *clears throat* taste good. Any local/organic honey will work.

Directions:
Put the cacao/cocoa butter in a double boiler. Or if you don’t have a double boiler, like me, you can just make your own. Put a smaller pot inside a bigger pot that is filled with water.  Once the cacao butter is melted, add the coconut oil and stir together.  Add the 4 drops of peppermint essential oil and the 3 teaspoons of honey (if using). Stir together.  Pour the mixture into a bowl and let it cool on the counter for about 10 minutes.  Then put it in the fridge for about an hour. You will see it starting to get hard.  After an hour or two, throw it in a mixer and whip it till it forms white peaks and becomes soft and fluffy.

You’re done! Scoop it into a jar and it should keep for 3-6 months at room temperature. You can always store it in the fridge which will help it to keep even longer…up to a year.

Have lots of fun with it! This recipe makes a little more than one cup if you whip it. That should last…well that all depends on you!

Email me for more information on how you can get quality essential oils into your home!  thenaturalcollective514@gmail.com

Thanks to The Paleo Mama for this idea!


Please note: Products mentioned in this article have not been evaluated by the FDA. These products and information on this page are not intended to diagnose, treat, cure, or prevent any disease. This website is not a substitute for professional care. If you have or suspect you may have a medical, psychological, or psychiatric problem, or a disability that requires medical attention, then you should consult your licensed medical doctor or appropriate health care provider. Always consult your medical doctor regarding your medical care. Never disregard professional medical advice or delay in seeking it because of something you have read on this website.